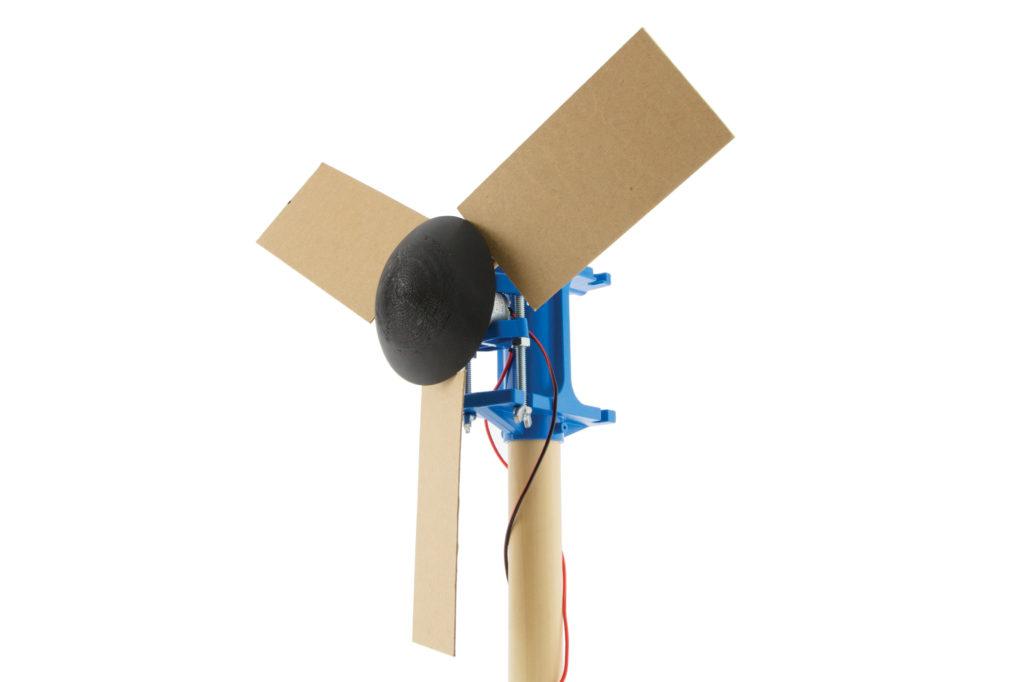
After reading about engineers at GE experimenting with nose cones to improve wind turbine efficiency, we decided to design and test our own nose cones on a KidWind Wind Turbine. One of our engineers created two different spherical-cap-shaped nose cones in a CAD program and printed them on a 3D printer. The nose cones were designed to fit onto the KidWind Wind Turbine Hub by fitting over the T-bolt and holding on with friction.
We designed a series of experiments to test the effect of the presence and shape of a nose cone under a wide range of conditions, including variations in wind speed, blade shape, and blade pitch:
| Wind speed | Blade shape | Blade pitch |
|---|---|---|
| Three speed settings on a Lasko, 20-inch square fan: high, medium, and low | Two rectangular blades: 1 inch × 9 inch and 3 inch × 6 inch | 10°, 20°, and 30° |
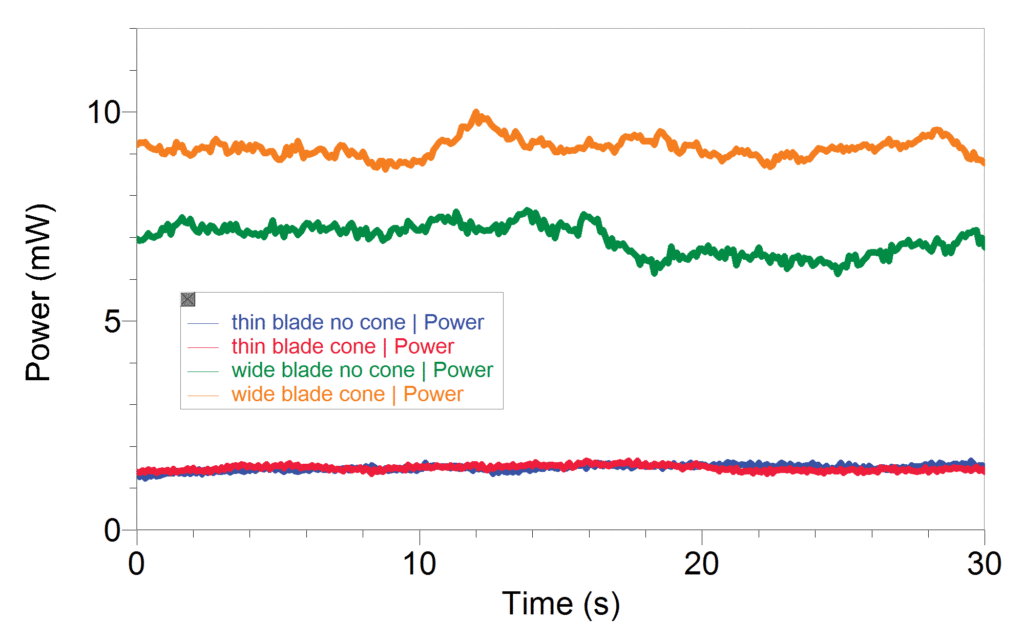
In the majority of our tests, the difference in energy generated with and without the nose cones was non-existent, or within the uncertainty values of the measurements. This was a disappointing, but meaningful, finding.
However, there was one set of trials that showed a significant difference when the nose cone was attached. At the highest wind speed, a load of 51 Ω, and the 3 inch × 6 inch blades at a 30° angle, the turbine produced an average of 7.0 ± 0.1 mW without the nose cone and an average of 9.16 ± 0.09 mW with the 4-inch-diameter nose cone—an increase of about 30%.

You and your students can do a similar experiment. If you don’t have access to a 3D printer, you can use hemispheres of expanded polystyrene from a craft store, which is what the GE engineers used for their early prototypes. If your students have experience with CAD software and access to a 3D printer, they can design their own nose cones or modify our designs, which are available for 3D printing at www.thingiverse.com/vernier
