Graphical Analysis app does not support sensors that don’t Auto-ID.
Use these sensors with LabQuest App or Logger Pro.
Generally, sensors built before we implemented the “Auto-ID” feature (~2002) require manual setup every time you use the sensor. This also affects a few newer sensors (e.g., Qubit sensors, Vernier Structures & Materials Tester (VSMT) position sensor, and Polarimeter (Chemical) (CHEM-POL) angle sensor), too. Below are instructions for manually setting up the sensor.
Using Logger Pro Software
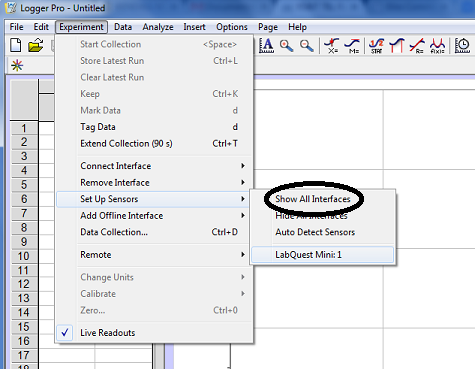
- From the Experiment menu, select Set Up Sensors ▶Show All Interfaces. This will open a dialog that displays the interface connected to the computer.
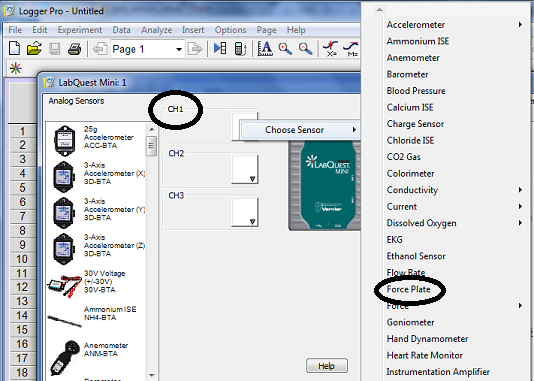
- Click the port the sensor is connected to and select the appropriate sensor. The interface should recognize the sensor.
Note: Once you choose the sensor, you may need to alter the data-collection properties.
Using LabQuest App
These instructions apply all LabQuest versions (screenshots are from LabQuest 2).
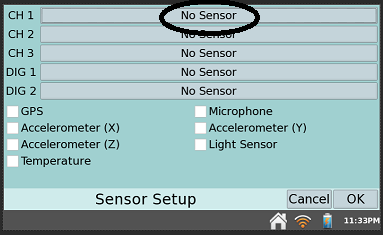
- Go to the Meter view by tapping the Meter icon in the upper-left corner of the screen.
- Tap Sensor and choose Setup Sensor from the drop-down list.

- Select the port the sensor is connected to and select the sensor from the drop-down list.
- Click OK.
Note: Once you choose the sensor, you may need to alter the data-collection properties.