This information pertains to LabQuest 2 and LabQuest 3.
The original LabQuest does not support this functionality.
Automatic Installation
Before manually installing the driver, attempt to install the driver automatically. For instructions, see
My Windows computer fails to install a driver for using LabQuest Viewer with a LabQuest 2 or LabQuest 3 via USB connection.
Manual Installation
If automatic installation does not work, for example, if you do not have an internet connection or group policy prevents Windows Update from updating drivers, then download the following files:
Download and extract the driver files
- For 32 bit OSes, download:
http://www2.vernier.com/til/2705/vernier_labq2_usb_viewer_driver.zip - For 64 bit OSes, download:
http://www2.vernier.com/til/2705/vernier_labq2_usb_viewer_driver64.zip
Unzip the file. If necessary, save the files to a USB storage device if you are trying to fix this problem on a computer that doesn’t have an internet connection or if you need to apply the driver to multiple computers.
Install the driver files
- Ensure your LabQuest is set up to work with the LabQuest Viewer via USB. For more information, see
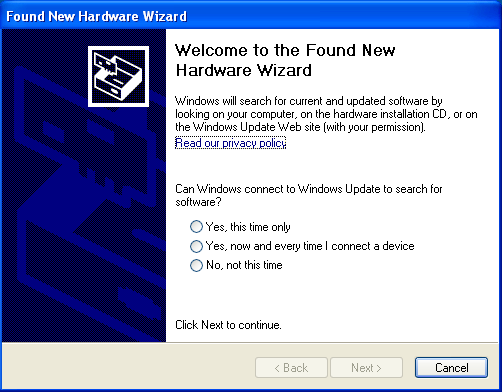
How do I connect a LabQuest to LabQuest Viewer via USB? - When LabQuest 2 is connected, Windows will start the “Found New Hardware” wizard, and may ask you if it should connect to Windows Update. Select either option labeled Yes, then choose Next.
Note: You may require Administrator rights for this procedure based on your local configuration. - Choose Install from a list or specific location (Advanced), then choose Next.

- Check the box for Include this location in the search, then choose Browse.
- Select the folder containing the unzipped file you downloaded; then choose Next. Windows will install the drivers.
Related Article
Are the LabQuest 2 or LabQuest 3 device drivers installed correctly?