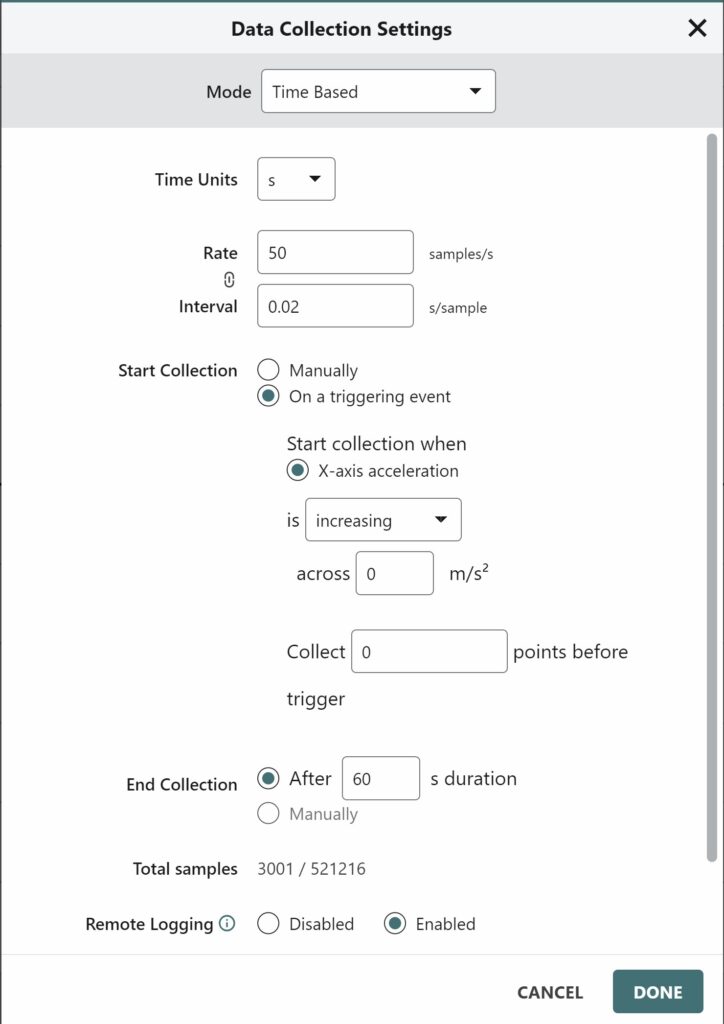
The two options for starting a remote data logging experiment are Manually and On a Triggering Event. When On a Triggering Event is selected, the Go Direct sensor waits for a trigger threshold
condition to be met before recording data. It is always a good idea to do a test run on the triggering event prior to running your remote data logging experiment.
Steps to configure a remote data logging experiment on a trigger
- Launch Graphical Analysis and connect your Go Direct sensor.
For detailed instructions for connecting the sensor to the Graphical Analysis app, refer to Getting Started with Go Direct Sensors.
- Click or tap Mode,
 , to open Data Collection Settings.
 - Choose the sensor channel used for the trigger and set the trigger threshold value.
● You can trigger as the sensor reading increases or decreases past the threshold value.
● You can choose to collect data points before the trigger condition is met. The time values for those points will be negative. - Set Remote Logging to Enabled.
- Click or tap Done
- Click or tap the Start Logging button,
 , to start monitoring for the trigger.

Monitor the Go Direct sensor for the trigger condition
- Once the remote data logging experiment has been started, the Bluetooth LED on the Go Direct device will do a red, green flash,
 , to indicate that the sensor is waiting for the triggering condition to be met.
 - If the sensor is configured to collect points before the trigger there will be a period where the Bluetooth LED does a green, double flash,
 . This indicates that the Go Direct sensor is clearing memory for the pre-trigger data. Wait until the LED changes to a red, green flash before preparing the sensor for the trigger.
 - When the trigger condition has been met, data measurements begin storing to the memory of the Go Direct device.
