This information pertains to the original LabQuest and LabQuest 2.
If you have LabQuest 3, see this article.
Here is how you can save your lab files to a LabQuest 2 or original LabQuest.
Activities built into LabQuest are in HTML format, and the basics of what we show here are that we export from Word into a web-friendly format (with some special options checked), then copy the files to LabQuest.
Converting from Word to HTML
- Open the file you want to transfer to LabQuest in Word.
- Recommended: We suggest you change the font of the text in your document to Arial or Verdana in order to improve readability of the text in LabQuest.
- Choose Save As from the File menu.
- Change the file type to Web Page, Filtered (*.htm, *.html)
- Click More Options…
- Click the Tools ▼ menu and choose Web Options…
- On the Files tab, uncheck Organize supporting files in a folder. (This option may not be available in all versions of Word 365.)
- On the Encoding tab, change the “Save this document as:” drop-down lists to Unicode (UTF-8).
- Click OK to close the Web Options dialog.
- Choose to save the file to your “Desktop”.
- Click the New Folder button.
- Type in the name of the lab for the folder name and click Open.
- Important:
- The file name must not include any spaces. You can use underscores to separate words.
- The file name extension must be “.html”. LabQuest will not recognize the file as a lab unless the file name has an extension of “.html”.
- Click Save.
- You may encounter a warning message about formatting. Click Yes to continue. The Office-specific tags that will be removed are unnecessary for LabQuest and are only useful if you were going to edit the HTML file in Word.
- You may also encounter a report of formatting changes. Click Continue.
- Close Word.
Copying the Lab from the Computer to the LabQuest
Using a USB Flash Drive or Secure Digital (SD) Memory Card – Original LabQuest Only.
- Copy the folder from your desktop to a USB flash drive or SD Memory Card.
- Plug the USB flash drive into the LabQuest’s USB port or SD Memory Card into the LabQuest’s SD slot.
- On the LabQuest, choose View Lab Instructions… from the File menu.
- Tap the flash drive or SD card icon near the top left of the screen.
- Select the folder you copied to the flash drive or SD card. Tap OK.
- You should now see the HTML version of the lab you created from Word. Select the lab by tapping on it once.
- Tap OK to load the lab.
Adding the Lab Files to the LabQuest’s Internal Memory – LabQuest 2 Only.
Note: This requires a Windows computer and will not work with the macOS version of Logger Pro.
- Connect the LabQuest 2 to the computer with the included USB cable.
- Start Logger Pro. You should see a LabQuest icon under the toolbar.
- Press the key combination: Ctrl–Shift–Alt–t.
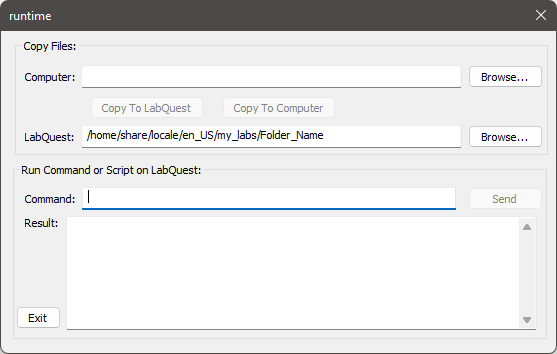
You will get a dialog box as show below: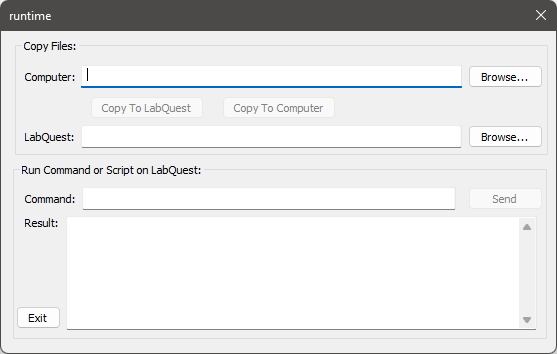
- In the Command box, type the following command: mkdir /home/share/locale/en_US/my_labs
Then, click the Send button. If the command was successful, the Result area should be blank. If you get an error, delete the error message text, check that you typed the command correctly including the single space after mkdir and no spaces anywhere else in the command, and try again.
(Note: Skip this step if the LabQuest already has a my_labs folder available in View Lab Instructions.)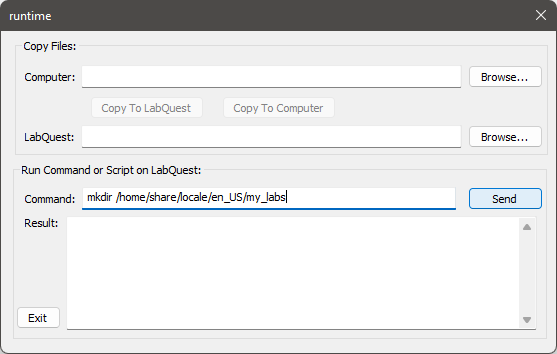
- In the Command box, modify the command to include a folder name for your experiment, where Folder_Name (shown below) is representative of the lab and does not include any spaces.
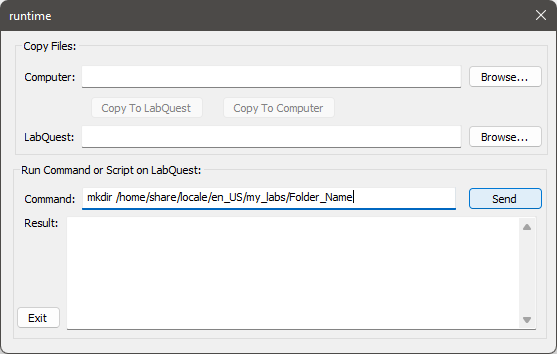
- Click the Send button. If the command was successful, the Result area should be blank.
- Type in the path that you created in Step 5 into the LabQuest field as shown below. Remember to replace Folder_Name with the name you selected in Step 5.
- Select the file you want to transfer.
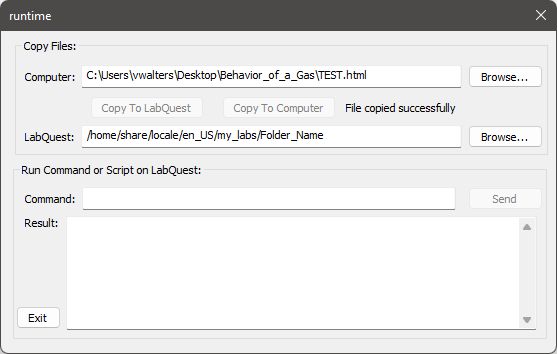
- Click the Browse… button next to the Computer entry field.
- From the file selection dialog, choose your “Desktop”, then double-click the folder where your lab was saved.
- In the Files of type: drop-down list, choose “All Files (*.*)”.
- Select the file you want to send (start with the “.html” lab file) and click the Open button to select the file.

- Click the Copy To LabQuest button. If the transfer was successful, you will see a message next to the Copy To Computer button.
- Repeat Steps 8 and 9 for each image associated with your lab.
(Note: If in Step 7 – Converting from Word to HTML you did not have the Organize supporting files in a folder option to uncheck, you will need to browse to the folder that contains the images for your lab. The folder containing the images is saved within the folder that contains the HTML file.)
Now you have your lab loaded on the LabQuest. Repeat as needed to save additional labs to your LabQuest.